 Graphic design is all about type face and composition. To get more familiar with the hundreds of type fonts as well as continuing to learn PhotoShop tools we are going to create two “Typographic Self Portraits'” using only descriptive phrases and words that pertain to you, such as poetry, song lyrics, and phrases your like to say (and hear).
Portrait #1 So in this tutorial you will learn how to create a really cool typographic portrait in Photoshop. We will use the Displace filter and some Blend Modes to achieve the effect. The whole process is quite simple but it might take you some time to add the texts and elements, but once you do that the rest is very straight forward.
Step 1
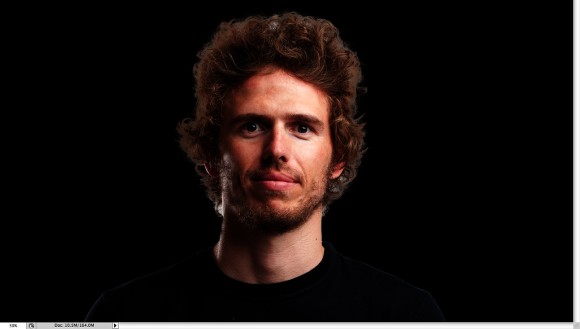
Open Photoshop and create a new document. Import one of your portraits and re-size your image to 8″ x 10″ 180 dpi. Extract the background.
Step 2
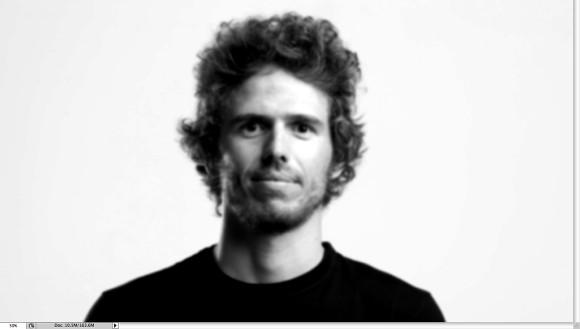
Duplicate the layer and go to Image>Adjustment>Desaturate. You will have a black and white photo. Add a white background. After that save the file, it has to be PSD otherwise it won’t work with the Displace filter.
Step 3
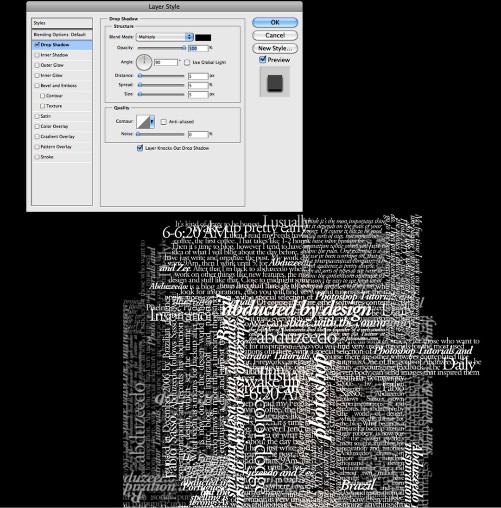
In a new layer with the Horizontal Type Tool (T) create text boxes and start adding texts. The idea is to play with the texts, they don’t have to be “normally legibile”, so play with the line-heights, reduce that so the lines overlay one another.
Also make some keywords much bigger and bold, like in my case I highlight some words like Photoshop Tutorials, Illustrator, Inspiration… Also, play with italic, regular texts as well as alignments and text sizes. Tip: I used Garamond for the font, I think serif fonts look much better for this effect.

Step 4
For each layer, go to Layer>Layer Style>Drop Shadow. Use Multiply for the Blend Mode,black for the color, 90º for the Angle and 5 pixels for Distance, Spread and Size.
Also, group all the layers and the duplicate the group. Go to Layer>Merge Group and then go to Filter>Blur>Gaussian Blur. Use 10 pixels for the Radius. This blurry layer will have to stay behind the regular one. The idea is to add some depth to your text, that’s why the shadow.
You can duplicate the orginal text again and move it a little bit to the top and left as well to add even more depth.
Step 5
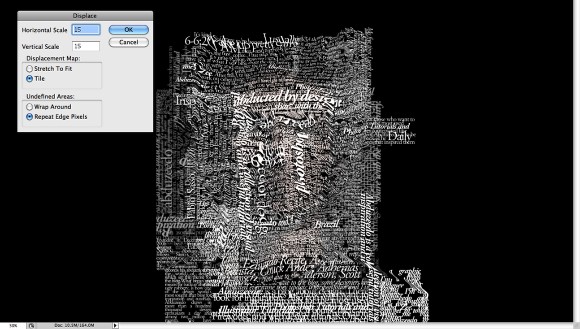
Select all the text layers and merge them into one layer only, then go to Filter>Distort>Displace. A dialog box will appear asking you to choose a file. Select the PSD file we created on the Step 2. After that for the Displace settings use 15 for the Horizontal and Vertical Scale; use Tile for Displacement Map and Repeat Edge Pixels for the Undefined Areas.
The displacement map will distort the layer based on the greyscale photo we used, the dark tones go down while the lights go up.
Step 6
Put the photo layer on top of the white text layer, then change the Blend Mode of the photo layer to Light Burn.
Step 7
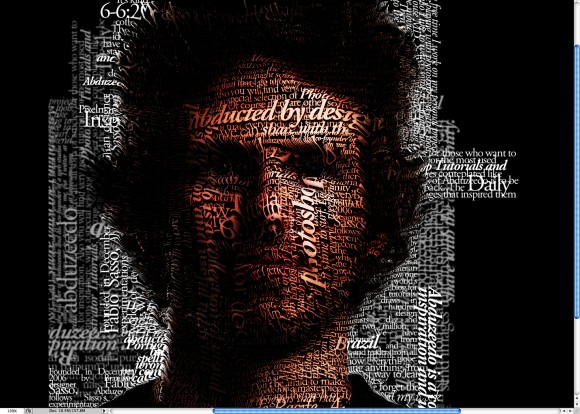
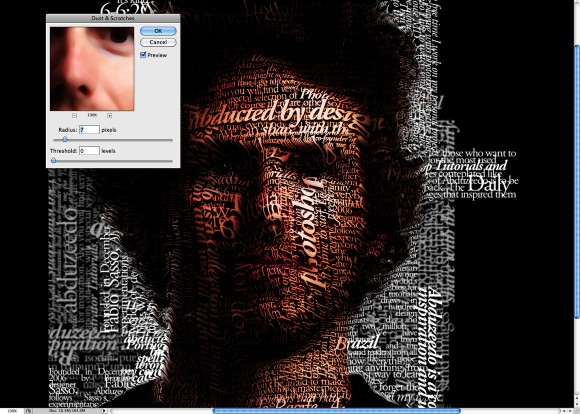
The photo has too many details, so go to Filter>Noise>Dust & Scratches. Use 7 pixels for the Radius and 0 levels for the Threshold.
Step 8
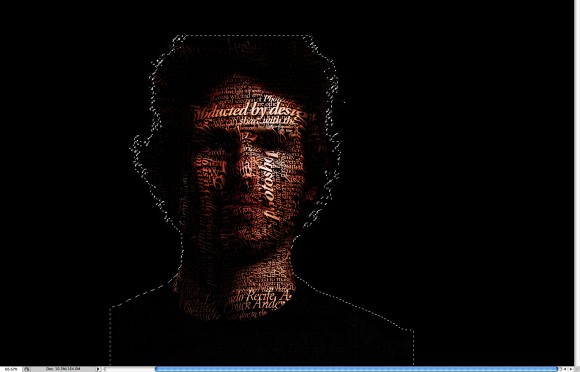
Mask the text layer so you will have just the texts over the photo.
Conclusion
You can reduce a little bit the saturation and as I mentioned before, you can add more text layers and even try different symbols and shapes.
There are many ways to create this effect, this perhaps is the easiest one, but you have to be very careful to make everything very subtle, otherwise the effect won’t look as cool as we expect.
Portrait #2 1. You may use an existing portrait of yourself or have a classmate take a portrait of you for this assignment.
2. In notepad take 10-15 minutes and brainstorm a list of words, phrases and short writings about yourself. What is important to you? Favorite words? Song lyrics? Places? How do you want people to view you/How do you view yourself? What do you bring to your community? Why are you important to your family and friends? Where do you spend time? What positive impact do you give to your community? These phrases and words will be used in this assignment. Some of these words may be the same ones used in your first typosgraphy portrait.
3. Choose a portrait of yourself and load it into Illustrator. Use the artboard tool to resize the image to fit. The original image should be around 5 x 7″
5. Create a new layer.
6. Select the pen tool. Select “paths” (not “shape layers”)
7. Create a third layer. Using the “pen” tool follow the line you intend the type to follow, left clicking throughout.
8. Select the “text” tool. Click within the line you just made with the pen tool. This can be a bit finicky but will work. Wait until the icon changes then type the words and phrases. Select the type size and style and begin typing in the words. You can change the type size and font anytime you are typing. Each phrase creates a new layer.
10. Continue throughout the image until the entire face in translated through letters, phrases and words.
11. Hide the original photo.
12. Save as a .jpg and upload the original photo and final image to your Graphic Design web page.
13. Upload both portraits to your web age. Write an paragraph reflecting on the relationship between the portrait and the words used. Hyperlink the word doc to your assignment’s title on your web page.
http://abduzeedo.com/super-easy-typographic-portrait-photoshop

