Have you ever taken a rapid series of group shots, but can’t find a single image where every single person is looking at the camera, eyes open and smiling? If you are looking for a quick way to combine two mediocre portraits into one perfect portrait, try the Auto-Align Layers in Adobe Photoshop CS3 and later.
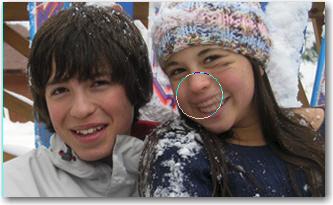
Take a look at the two images below. The one is better of the boy, but the girl has her eyes closed. In the second picture she looks better, but he’s got one eye closed.There are many ways to combine these two pictures using Photoshop, but the single most efficient technique is to combine both images into one file, each on their own layer. Then, using the Auto-Align Layers command you can let Photoshop line up both images with each other, and then just use a mask to punch through to the underlying image.


Let’s give it a try…
- Take a series of picture – portraits – of two friends in rapid succession. Be sure that you have a “good” photo of each friend, not necessarily oin the same photograph. Open Adobe Photoshop.
- Open up two images you would like to combine.
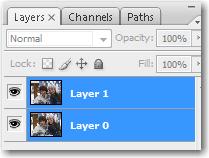
- Using the Move tool, Shift + drag one image into the other file. (Using the Shift key as you drag centers the incoming layer in the new window.)
- Double-click each layer name in the Layers panel to give each layer the friend’s name.
- Drag the thumbnails up or down, so that the top layer is the better image, but the bottom layer has a better expression on one or more of the subjects.Select both layers by clicking on one and then shift-clicking the other.
- Choose Edit > Auto-Align Layers, and set Projection to Auto. (This allows Photoshop to align two rapid sequence photos, making it easy to remove the goofy expressions from the top layer and expose the better expression from the bottom layer).
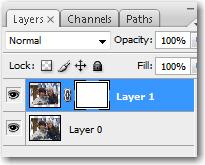
- While novice PhotoShop users may opt to use the Eraser tool to carefully erase the girl’s face from the top layer, for the Intermediate to Advanced user, a Layer Mask is a much better solution. To use a Layer Mask, select the top layer, and choose Layer > Layer Mask > Reveal All.
- Press the letter D on the keyboard to reset your color chips to Black and White.

- Use the Brush tool with a soft brush to paint away to the underlying layer, exposing the image underneath.
- If you remove too much of the top layer, just press the letter X on the keyboard to switch your colors so that White is on top, and paint back in pixels from the top layer.
- When everything is perfect, flatten the layers and you have created a fabulous portrait out of two mediocre ones.
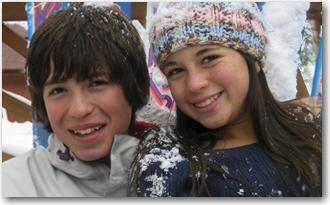
- Post two bad images that you put together with one good “double portrait” on your web site.