This assignment is very detail oriented, you need to make sure to pay attention to every line and color in order to have a successful portrait.
Steps:
- Select a portrait from the folder on your flash drive.
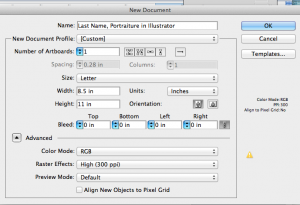
- Open a new document in illustrator and make sure to have the below settings

- Go to File>Place and find the picture in your folder. Before pressing place make sure that the Link and Template boxes are not checked.
-

- Place the photograph in the center of your paper and enlarge it until the person’s head and part of their shoulders fill as much of the paper as possible.
- Go to Using the Selection tool go to Window> Trace Image. Choose Advanced. Make the following adjustments.

- Click Trace. This step takes awhile but once it is done it will give you better idea of where the lights and darks of your picture are thus helping you create all the shapes you will need for the different colors of the face.
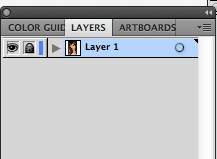
- Open your layers panel (go to Window and make sure Layers is checked) and lock the layer with your picture in it.

- Select the pen tool and make sure that the fill and stroke are set to
 or else you will not be able to see what you are tracing.
 - Go to your layers panel and create a new layer by clicking on the curled paper next to the trash can.
- You will be creating all of your lines in Layer 2.
- Begin by dropping an anchor point on the bottom left corner where the shoulder begins and make your way around the head and finish on the other shoulder.
- Make sure to click and drag anchor points when you need the line to curve. Remember to check your progress by turning Layer 1 off and on to check your progress. YOU DO NOT NEED TO USE A LOT OF ANCHOR POINTS.
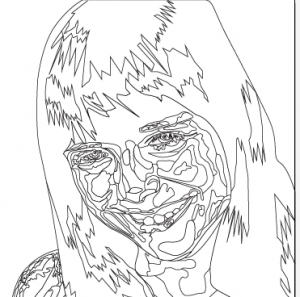
- Once you have the outline of your person done you can move towards the face. Make sure that all lines touch another line or else you will have a hard time painting.
- The more detailed you are the better your portrait will look. You need to make lines for the different tints and shades.

- Once you have completed your outlines turn off your layer one and check your work. If it look goods make a duplicate of layer two. Now Lock Layer 2.
- Now go to Layer 2 copy select all the lines and change the stroke to NONE
 and then go to Object > Livepaint > Make in order to paint all the shapes that make up your face.
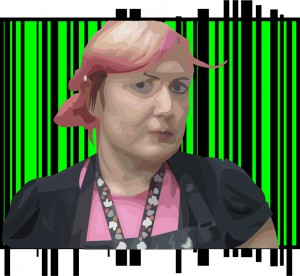
 - Use the eyedropper tool to select colors from the photograph to paint your portrait.
- Remember to use the panels below to obtain different tints and shades.

-
Requirements:
- Make sure that the portrait fills as much of the page as possible.
- The “person” is NOT centered in the page. (To the left or right)
- The top of the head and part of the shoulders are visible.
- Use a minimum of 10 tints and shades for the skin tone (this will make it look more realistic).
- Create a background color and pattern to be placed behind the portrait
- RGB color mode
- Labeled correctly (last name,first initial_portrait
Save the file as a .jpg and add to your web page.
http://mrscarmon.edublogs.org/beg-graphic-arts/portraiture-in-illustrator/

